
Kombucha like crazy…
I really like Kombucha. I like it enough that I pretty much drink a glass or bottle daily. So, I've decided to finally start making my own.
I really like Kombucha. I like it enough that I pretty much drink a glass or bottle daily. So, I've decided to finally start making my own. This is something I've wanted to do for quite a while now but never got around to actually doing it. I think it landed on my mental list of 'things I'd like to do', but never made it over to the "I'm doing this" phase. Until recently. So, to prepare I watched a couple videos on YouTube and then my awesome neighbor (and friend) came over and walked me through it. It's actually super easy! It's also pretty fun when you get to the second fermentation when you get to flavor it and it becomes carbonated. So, now that it’s my chance to share, let me make it easy for you and walk you through how I make it.
Here’s what you do:

Step 1: Get your materials together. You're going to need a teapot, a large glass container, cheesecloth and rubber band, a wooden spoon, 8 tea bags of black or green tea, a SCOBY and some starter tea, and 1 cup of sugar. I got a great kit that had the glass container, cheesecloth etc. on Amazon, which made it really simple. Here's the link in case you'd like to do the same. I’ve also included the link for the SCOBY and starter tea kit.
SCOBY link: click here
Large brewing jars and cloth link: click here
Step 2: Fill your teapot and bring it to a boil. While you're waiting for the water to boil, take your large glass container and run it under warm water to get it ready for the boiling water you'll soon pour in it. Also, open all your tea packets and have them ready to go.
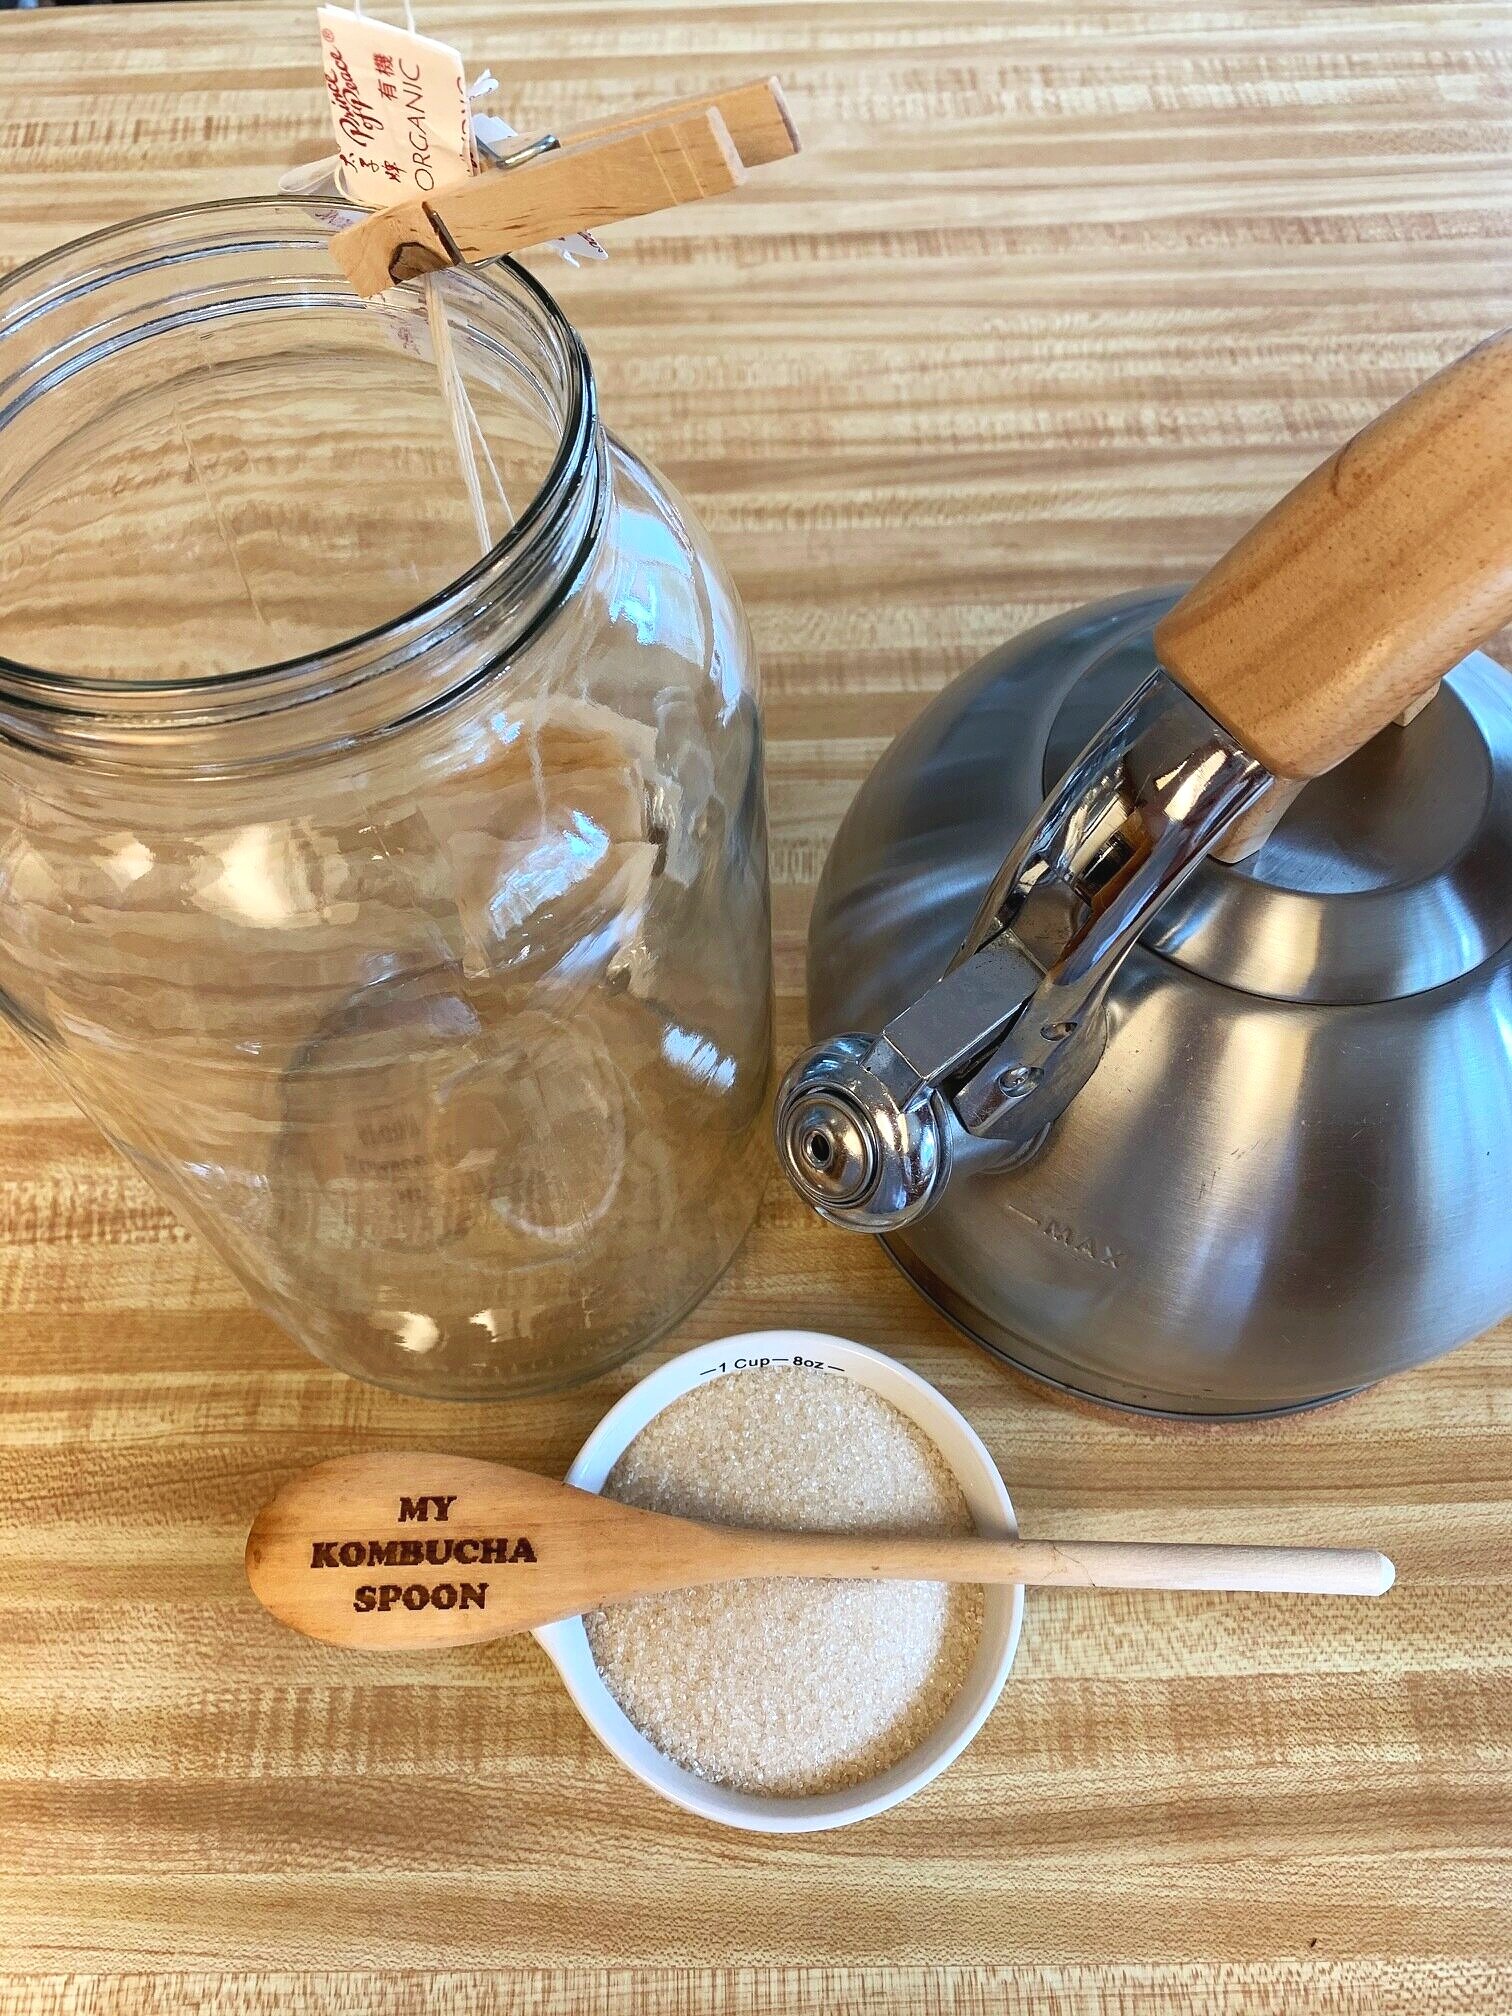
Step 3: Place the tea bags in the large glass container and pour the hot water over the top of them. (I use a wooden clothes pin to hold the tea bags together and clip it to the mouth of the container) Pour in the sugar and gently stir it with your wooden spoon until it mostly dissolves. Now just set the tea aside until it completely cools. (insert pic of this step)
Step 4: Once the sweetened tea has completely cooled, add more water to the jar, leaving just enough space at the top for your SCOBY and starter tea.

Step 5: Now it's time to pour in the starter tea and SCOBY. This is what makes all the magic happen! Your SCOBY should float at the top of the container, but if it sinks to the bottom, don't worry. A new SCOBY will start to form at the top of the brew in a few days. Then you'll have 2!
Step 6: Now place the cheese cloth over top of the jar and secure it with the rubber band. Carefully pick the jar up and put it in a dark cabinet, or shelf that’s somewhere out of any direct sunlight. It also needs to be at a temperature of somewhere between 75-85 degrees Fahrenheit consistently. A cabinet above your fridge or a kitchen pantry would work beautifully.
Now all you need to do is let it do it's thing. You can start tasting your brew to see how things are progressing around day 8-10. You do this by carefully inserting a straw down the side of the jar and placing your thumb on top of the straw once it's full. Then gently pull the straw out and put in a glass to taste. Never drink from the straw or sip directly from your jar. You don’t want to contaminate or introduce bacteria to your booch! Usually it takes 12-14 days for my first fermentation to be done. I tend to like mine a bit more on the vinegar side, not too sweet, so I let it sit a little longer. That's it! Now you know how to brew Kombucha in its first fermentation.
If you're wondering what to do once your first brew is finished, take the SCOBY out (with clean hands) and set it in a glass dish along with 1 cup of the finished tea. This becomes the starter for your next batch and the fun continues! Now you can start the process again so its brewing while you're enjoying the batch you just finished. With the remaining tea you can either put it in the fridge or pour it in to single serving containers and do the same. Or, you can flavor them and do a second fermentation. That's what I do and is likely what you're used to if you've been buying your Kombucha from the store up until this point. I'll write about second fermentation in another post soon.
If you are a serious Kombucha lover like me, I hope you try it out. I think you'll really enjoy the process, especially when you discover how easy it really is. Have fun and let me know how yours turns out!
Cheers!

Kombucha…wait, Kom-who?
By this point, I assume most people either have tried, or at least heard of Kombucha. If you haven't, please consider this your official introduction…

By this point, I assume most people either have tried, or at least heard of Kombucha. If you haven't, please consider this your official introduction. Kombucha is basically a fermented sweet tea. It is made by taking sweetened tea and adding a SCOBY to it, then allowing it to ferment. SCOBY is an acronym for symbiotic culture of bacterial yeast. It is also what makes all the magic happen.
By mixing the sweet tea and SCOBY, it ferments and creates a delightful beverage that is full of probiotics and B vitamins, which are good for your gut and your brain. Adding fermented foods (think yogurt, kimchi, sauerkraut) and beverages (water or yogurt kefir, Kombucha etc.) can be highly beneficial for our bodies and aid in digestion and overall good health. You may be wondering if it could really be all that healthy if its loaded with sugar (sweet tea) and does it contain alcohol if it's fermented?? Great questions, I'm glad you asked.
During the fermentation process, the SCOBY feeds on the sugar, depleting the sugar content to a minimal amount by the time it is finished brewing. As far as alcohol content, sure it's possible that it could turn in to alcohol if you let it go long enough, but if you follow the typical fermentation times there is only a trace amount. We're talking somewhere around 0.5%.
You may also be wondering, why make it at home? I have had some funny conversations with people when we've talked about home-brewing Kombucha. I think images of old timey, backwoods Moonshiner operations come to mind for them. But, this is totally different and completely legal, haha! It's also very enjoyable! Making it at home may not be for everyone, but for us it has been great. We drink it often enough that at $3-$4 a bottle, we can easily spend a small fortune each month on it. Making it at home only takes a few minutes of my time and costs a fraction of the amount. Plus, you get to tailor suit the flavors to what you know you like and the options are endless.
Well, I hope you enjoyed reading this as much as I enjoyed writing about it. If you're interested in learning about how to make Kombucha at home, stay tuned for those posts which are coming soon! Also, if you have any questions about it, please feel free to email me or leave a comment.
Enjoy!

Seasons of life.
These last 2&1/2 years have been seemingly the least "productive" years of my adult life…but in reality, they've been the most transformative. Unproductive in the sense that I didn't "do" much. At least not that I formerly had been known for or identified with. In the years prior to this season, I had lived a very full and seemingly abundant life.

These last 2&1/2 years have been seemingly the least "productive" years of my adult life…but in reality, they've been the most transformative. Unproductive in the sense that I didn't "do" much. At least not that I formerly had been known for or identified with. In the years prior to this season, I had lived a very full and seemingly abundant life. I was self employed as a hair stylist and had a great clientele that I loved. I also taught group fitness classes, which gave me the chance to lead some of the most remarkable people through some pretty gnarly workouts, that were filled with laugh-crying nearly as much as sweat! I also had my home life, responsibilities as a wife and mother, my friends and other commitments as well. Life was full, I was productive. On a day to day basis I accomplished a lot.
But gradually, over those years, I lost my joy. I had been so goal oriented and driven, that I didn't see what I was missing. I finally realized that I knew what I did, but not who I was. I had spent all those years doing things that I mistook as part of my identity, rather than doing those things as a byproduct of who I already was. And so the longing for change began to take root, as well as the need to reorient, regroup and rest. I needed to find out who I was. The only problem was, I had no clue how to do that or what that would look like. The only thing I did know, was that my inner longing was intense.
And then our whole world radically shifted in a moment. We found out that a school we wanted our kids to attend had openings right then for each of our girls, spots that would likely be impossible if we waited until the next school year. So we decided to jump, and over the course of 3 weeks, closed my business, sold our house and relocated to a little town about 3 hours North from where we were.
When I look back, I wonder how we even navigated those 3 weeks. Or the first few weeks after. It felt like we were picked up in a whirlwind. And when we landed…I felt like I had been running a sprint and had my feet kicked out from under me, skidding to an abrupt stop. I was completely raw inside and out. Emotionally I felt like a freshly skinned knee that had been skinned again. I was so wound up from the 7 years prior that it took me 10 months to realize I had been given exactly what I had yearned for…a season of rest.
After I came to that realization, during the next year and a half, I began to heal. I healed through learning to express myself in new ways, building new friendships and doing a lot more of the things I loved but never had enough time for before. Things like just hanging out with my family, without an agenda. I also spent more time gardening, chicken keeping and giving our house and property a much needed makeover. This gave me the chance for my hands to be busy and my mind to be free. This is where I found out who I am. Because I had the chance to stop doing and start being.
While I was walking through these past couple years, I had so many days where I wondered if I had lost purpose or if what I was doing now had any value. I also had times where I felt completely insignificant. The part of me that knew I was created for more was at war with the part of me that longed for the anonymity I had grown so accustomed to. I would go on long walks with some of my dearest friends and cry about what my future held. Other times I would be perfectly content that my life could stay exactly the same forever and it would be enough. All of which was necessary.
Coming full circle back to right now, as I am getting ready to launch this blog, I can finally see what happened these past few years and why it was so necessary. In taking this time, I was actually living my life, not doing it. I was free from many of the things, that though they were good, had kept me from cultivating my life in a way that produced only out of who I am. I had been doing it backwards before by trying to be who I was by what I was doing. And by just living life, feeling like I was "doing" nothing, I ended up with the capacity to share my life with others by sharing what I love. So when it came to starting this blog, turns out I had all the content and material I needed to do it…just by living life, letting it sink in, and taking pictures along the way.
So, if you have been in a season of wondering what you are even doing, or wondering what your purpose is, I want to encourage you to be intentional with living. Be present in the moment you are currently in. Trust that what you are doing right now is part of the foundation you need for the next season of your life. You may not feel seen right now or very purposeful, but your life has value and this time is needed. And know that just by continuing to move forward each day, you will be ready for what your next season will bring.
Living life along with you,
Tove

Composting 101, the basics
This post is for anyone that is interesting in getting started or has just started venturing in to the world of composting. I have to say, when I started composting, what I enjoyed the most was that I would be able to really minimize our food waste, while turning it back into something that would feed our garden.
This post is for anyone that is interesting in getting started or has just started venturing in to the world of composting. I have to say, when I started composting, what I enjoyed the most was that I would be able to really minimize our food waste. I had also just started vegetable gardening as well and had heard that composting was like creating an unending source of "black gold" that would build up our soil and nourish everything we grew. That was enough to sell me on the idea and I jumped right in.
These are the most important steps for getting started and you can easily build upon them as you get the hang of things. First, you need to decide what type of container you want to use and where you are going to put it. Or, you can forgo a contained area and just do a pile. (I don’t recommend a non-contained pile if you want to keep animals out of it or easily be able to collect your finished product.) There are a myriad of different options to suit your desired and spatial needs. We chose to build our compost area out of wood pallets and lined the inside with construction mesh. If you are interested in doing the same, make sure when collecting your pallets that they are not made from treated wood. Treated wood contains chemicals that can leach into the compost and contaminate it. You can tell they are clean by looking at the stamp that is on the pallet itself. These are the stamps you want to look for and what they mean:
The treatment code : [HT] = Heat treatment / [MB] = Methyl Bromide / [DB] = Debarked / [KD] = Kiln Dried. DB (Debarked) and HT (Heat-treated) Above are the two most important information to check on the pallet stamp
(For further pallet info, check out this link: Click here for more information.)
Avoid ANY pallet that has MB stamped on it!! Heat treated, kiln dried and debarked are fine usually. I'm no expert, but this is the information I used when selecting my pallets. I encourage you to look at the link I posted above as well as do your own research until you feel confident you're making a good choice:)
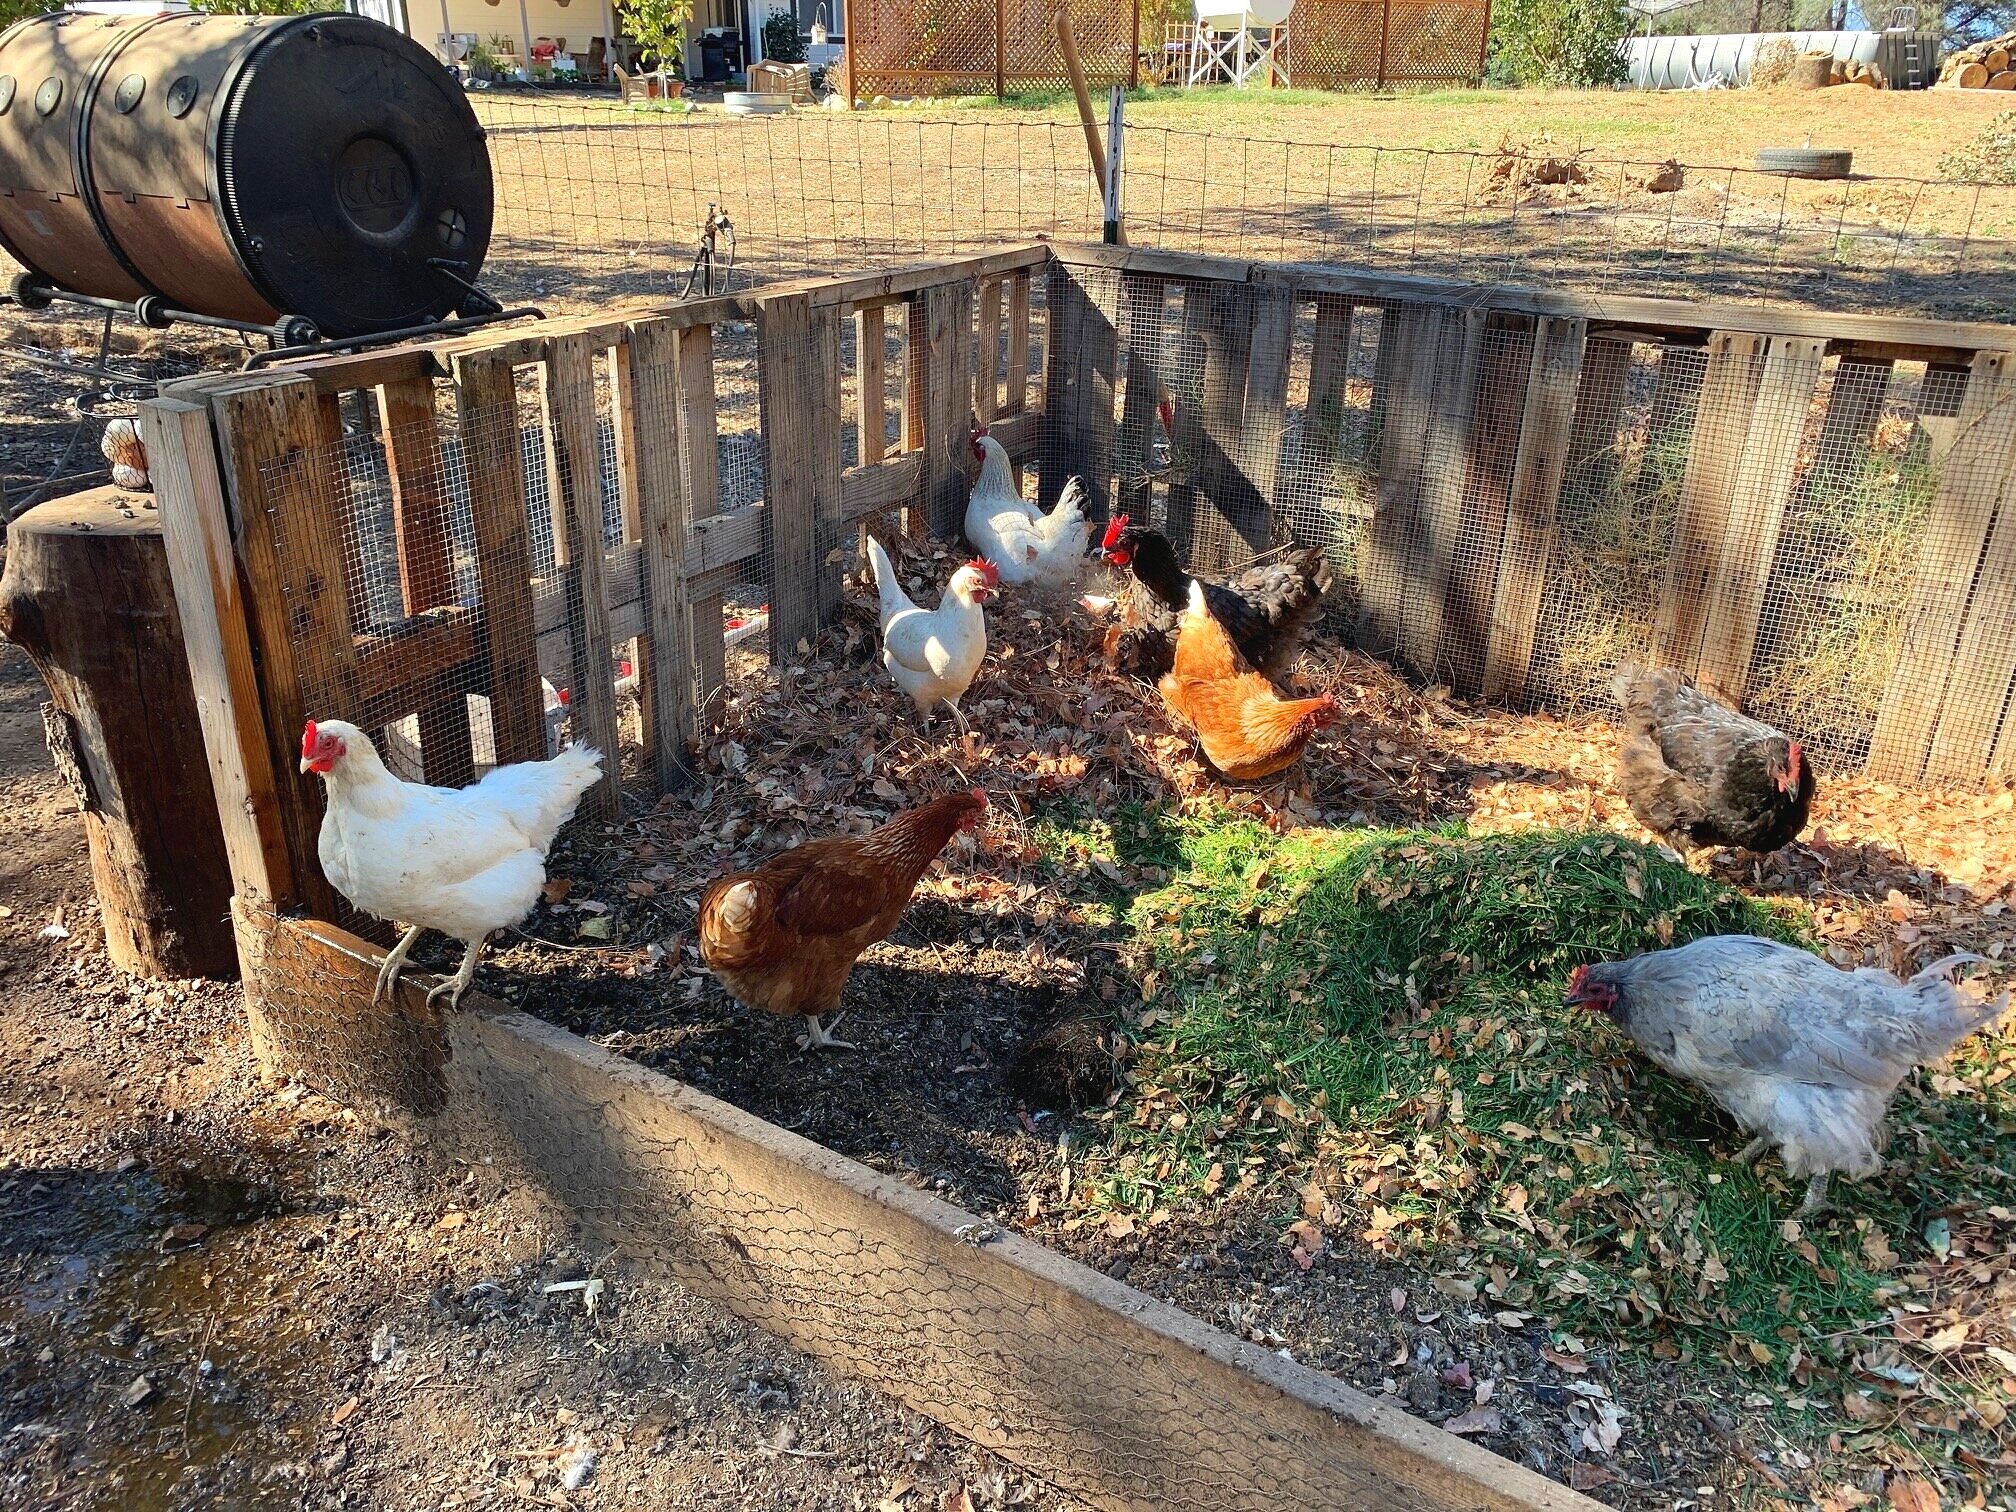
This is our compost bin in the chicken coop. You can also see out tumbler off to the left. It’s years old but still works as well as the day we got it.
You can also choose to purchase a bin or tumbler. If choosing a bin, try making one from untreated wood you have lying around or chemical free pallets, if you have the space for it. Or if you live in a more compact space, a bin like this would be great! Here's the link. The difference between a bin and a tumbler is with a bin you’d still need to manually shift the pile around and the tumbler has a handle you can turn, taking a bit of the work out for you. I have both, a large bin made from pallets and a large metal tumbler for when I need to get finished compost more quickly.
As far as a tumbler, this one is the route I would lean towards in choosing a tumbler being that it’s metal, BPA free and would hold up well in all seasons. Click here for the link. My husband always reminds me to make the best possible quality choice as my first choice so I don’t have to rebuy something once it either breaks or falls apart because it’s cheaper. He’s always been right. Sigh…the man knows his tools!

Here we just added some fresh grass clippings and a bunch of fallen oak leaves and pine needles. Thankfully fallen leaves are in abundant supply right now.
Now you get to start collecting your materials while you wait for your container to arrive or are building one. To make things really simple you only need 3 things to compost successfully: brown materials, green materials and water. Brown materials are things such as dead leaves/needles, cardboard, paper products, dead garden plants etc. These materials are carbon producers in the compost. Green materials are fruit/veggie scraps, animal manures (non-carnivores only!) fresh grass clippings etc. These things are nitrogen builders for your compost. Ideally, you want to always shoot for a ratio of 75% brown materials and 25% green. This will keep things balanced and not too hot, allowing for the beneficial microbes and all the goodies to grow during the decomposition process.
Lastly, now that you have your materials all added together, its time to water your pile. You want to always keep your pile damp. If it gets too dry, it will slow the decomposition process and everything will just dry up and not break down. You don’t want it soggy or too wet either. Try to shoot for it feeling moist when you touch it but not so damp that your hand is wet after touching it. After watering it, you want to turn the compost, mixing everything up so its evenly moist throughout the whole pile. Turning the pile allows for oxygen to get in, which is a crucial step in the whole breakdown process. The microbes that cause the materials to break down need oxygen to survive, so turning the pile ensures they have what they need. Aim to water and turn your pile 1-2 times a week or any time the pile starts to look dry. I have found this tool to be extremely helpful in turning my compost, rather than a pitchfork or shovel. I also use it to spread the woodchips in my garden. It’s fantastic! Click here for the link.
These girls love when we add fresh grass clippings to our pile! Another reason why I grow fodder for them regularly.
If you have chickens, another great time saving option is to put your compost bin in your chicken run and let your girls do the turning and work for you! (and as you can see, I can’t even get a picture without having my girls front and center!) Then all that's left for you to do is to water it as needed. How often you water is dependent upon the season and how wet/dry it is. Also, how quickly your compost breaks down into useable compost will depend on the temperature and moisture level. You can do more research and find out the ideal composting temps etc. by doing a quick Google search if you like, but I've found that as long as you keep adding material, watering and turning your pile, nature does its thing and soon I have beautiful, nutritious compost that my garden and fruit trees love.
Happy composting!

Molting…why your chickens have bald patches.
If you're a seasoned chicken keeper, this isn't going to be news to you. But, if you are newer to it and haven't had chickens for more than a year, then this will be some good information for you.
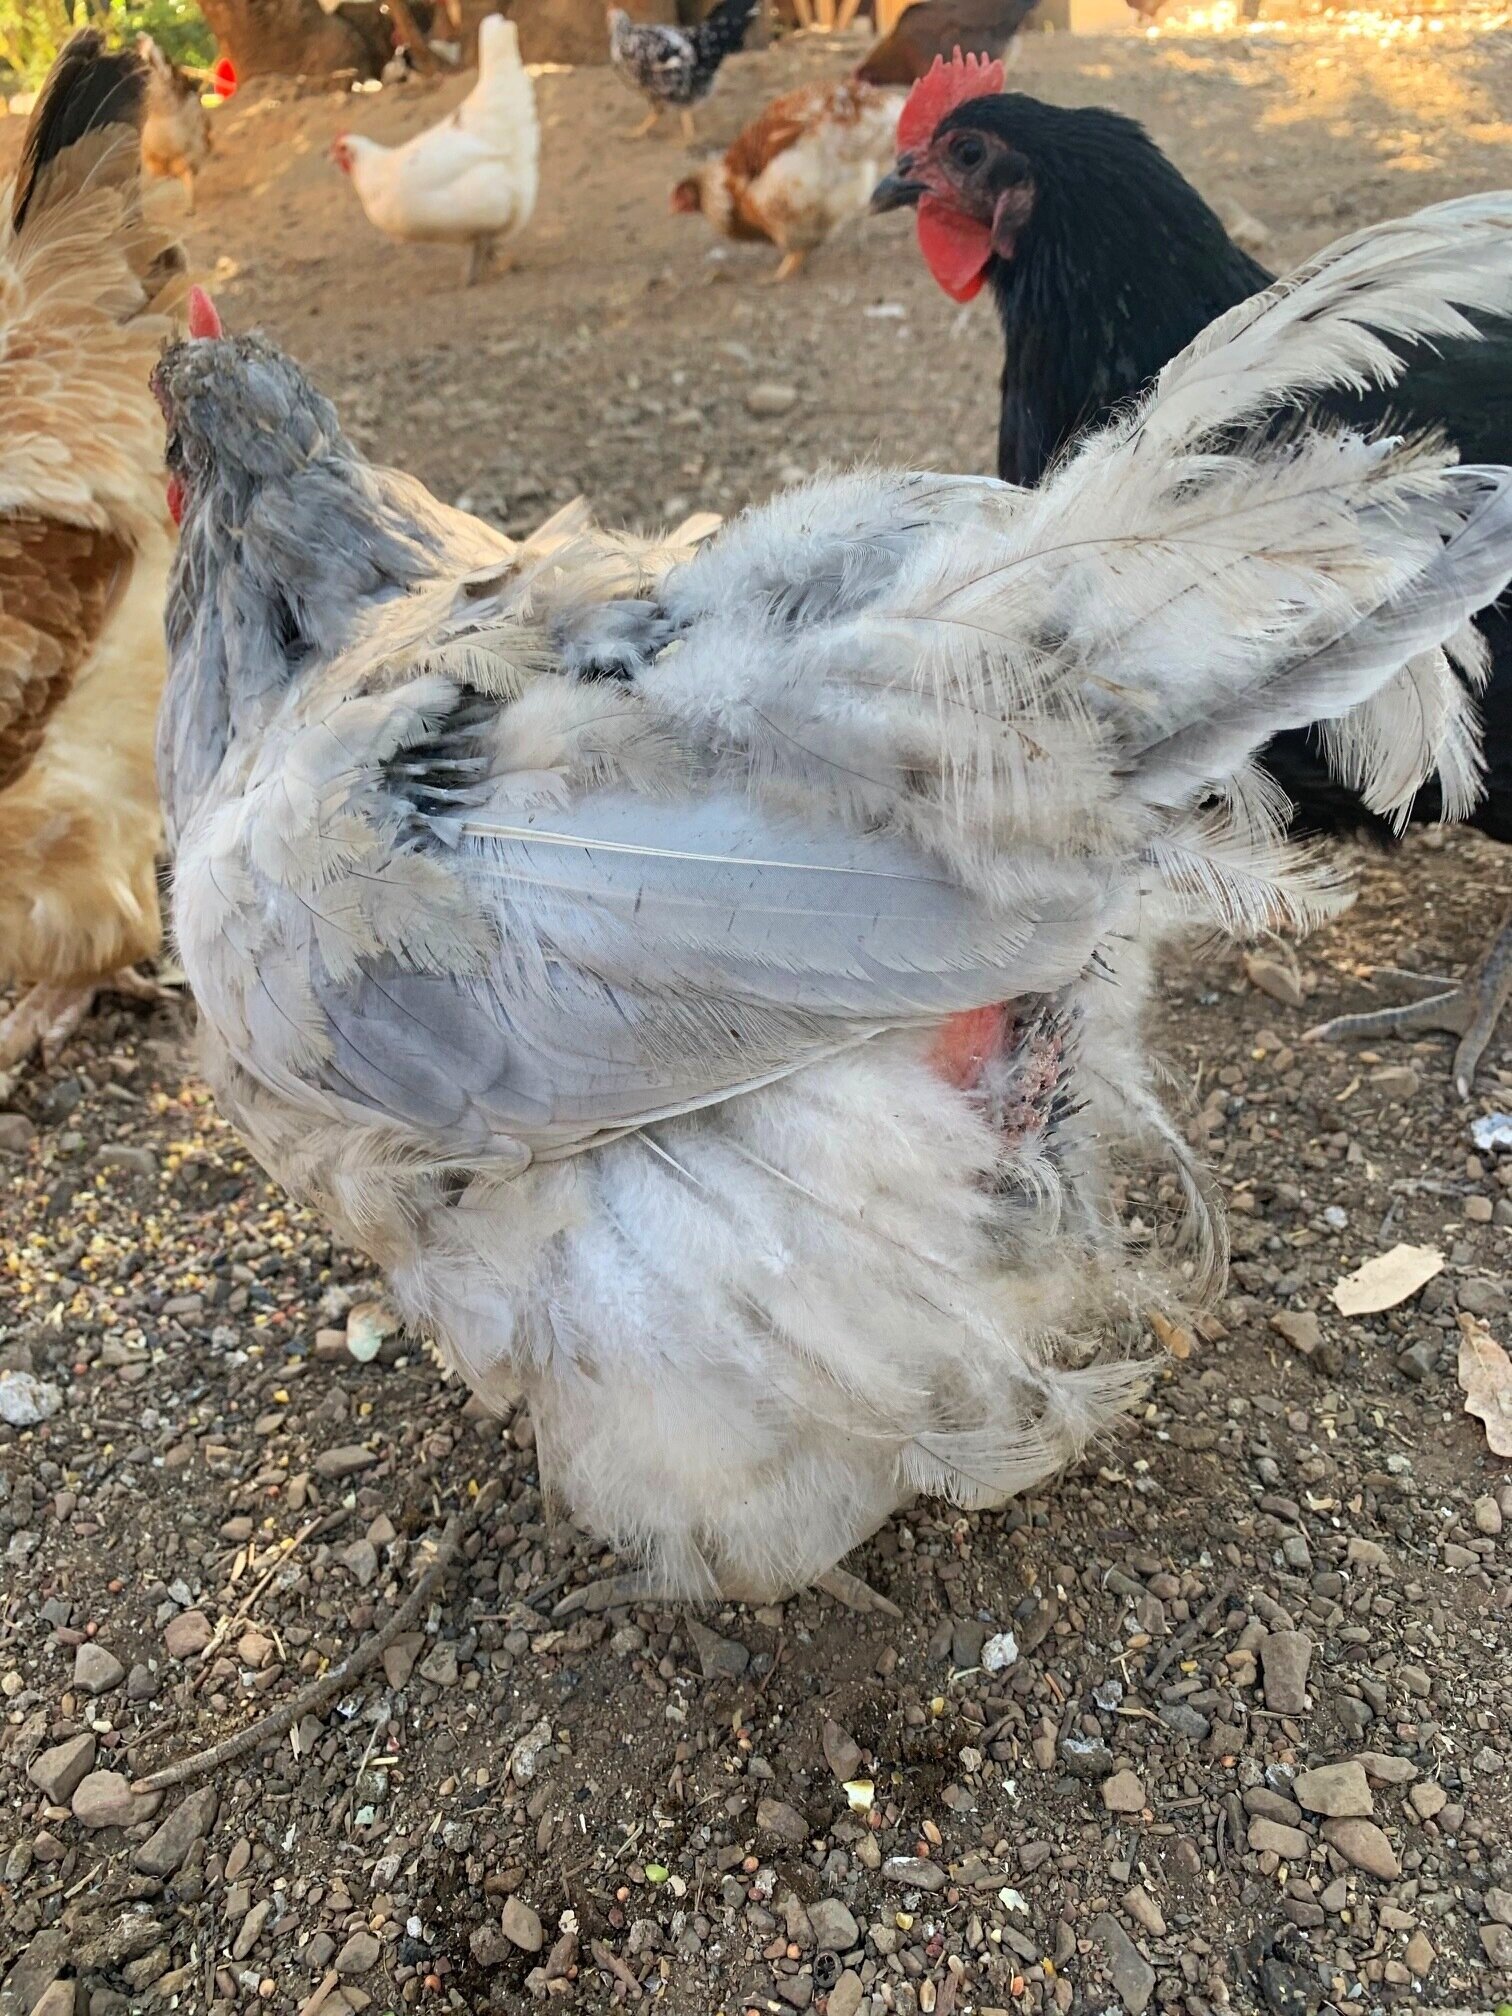
This is an example of a soft molt. Poor girl looks a little rough…
If you're a seasoned chicken keeper, this isn't going to be news to you. But, if you are newer to it and haven't had chickens for much longer than a year, then this will be some good information for you.
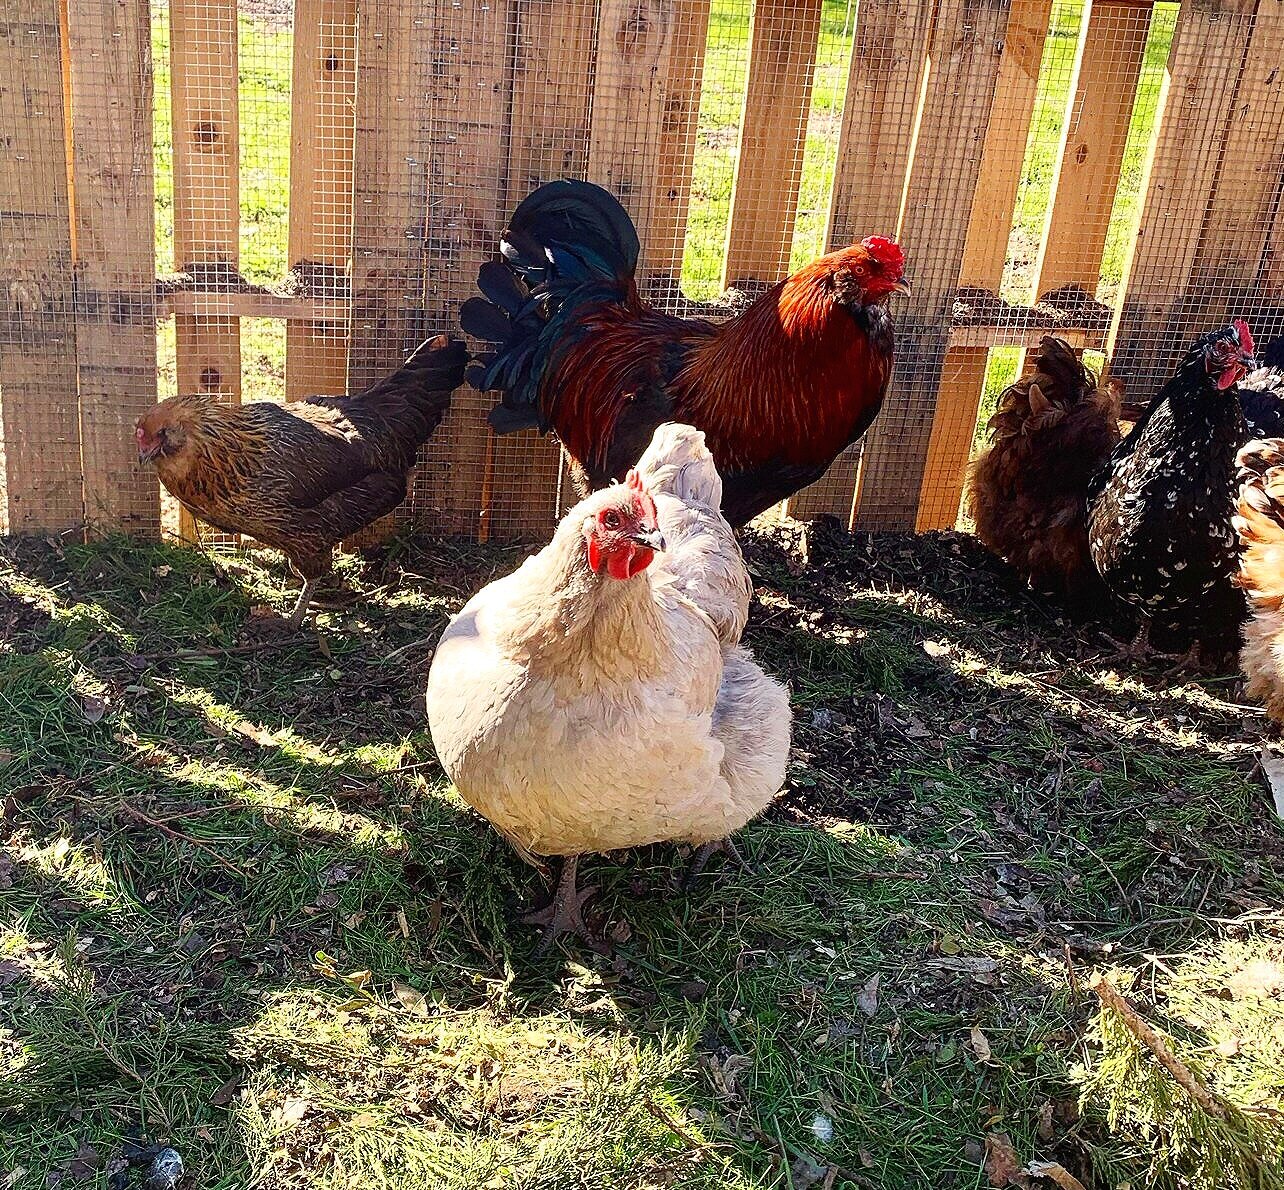
Most people get their chickens in the Spring and raise them up through the Summer, usually having eggs before the Fall. The first year of your chicken's life is all about healthy growth and development, and of course for eggs! Then your daily chicken routine seems to fall in to a rhythm and flows accordingly. It's a beautiful thing. Once your chickens have reached their second Fall however, there's another addition to that flow. Molting Season.

(Bonnie is having a rougher go. I think she was a little miffed about having her picture taken in her current condition, I had to bribe her with mealworms for her to stay still for this picture!)
What does it mean when your chicken is molting? In simple terms, your chicken loses some, or most of their feathers and grows fresh, new ones. How many they lose can very from chicken to chicken and some may only lose a few around their neck, vent or back (a soft molt) or they may be darn near bald (a hard molt). Either way, it's completely normal and will become an annual thing from then on. It can look a little crazy in the yard with feathers all over, but shouldn’t last more than 2-6 weeks, depending on how hard their molt is. Also, if you have roosters, they typically never molt as severely as a hen will. I’m not sure why exactly, but they don’t. (the boys always get off easy, don’t they??)

These are great options to supplement and support your flock during their molt.
During the time your chickens are molting, it's important to supplement their diet with additional protein. You can do so by adding mealworms, supplement with scratch, or by buying a feed with a higher protein ratio just while they are molting. (You don’t want to keep them on a high protein feed when they are not molting because it's not good for their kidney's). I also like to grow wheatgrass or oat grass fodder for my birds along with adding mealworms. They seem to think it's pretty great, so I roll with it! (If you want to know how to grow fodder, keep an eye out for my post on it.) I also add kelp meal to their food during molting season and during any other time my birds seem to be under additional stress. I add about 2 cups of kelp meal per 40lb bag of feed.
Another thing to note during molting season is that your ladies will likely stop laying eggs during this time. It takes a lot of protein to grow feathers, so the chickens’ body will slow or stop egg production altogether in order to concentrate on regrowth. Once their feathers are regrown, egg production will resume until it slows again during the winter months.

This is from our rooster, not from molting.
Another little side note. There are other reasons your chicken could be losing feathers. Sometimes they will get a bald patch on their back from the rooster, depending on how attentive he is. Some guys are just rough on those poor ladies. Other reasons could be from the hen herself, plucking feathers out that were either damaged or dirty etc. They can also lose feathers from parasite issues that have become severe. These are much less common though if you’re taking adequate care of your birds. A quick, clear indicator if it's molting and not something else, is that molting nearly always happens in the Fall and will affect multiple birds from your flock to one degree or another.
Well, I hope you feel a little more informed of what's happening to your flock, or will be ready for when it does.
P.S. If you're wondering what to do with all those feathers in your yard and you've got a compost pile, throw them in there. It may take a while to break down, but they are completely compostable.